If you already have an Apple ID:
Shop Amazon Electronics - Over 40 Off Select iPhone Cases
When you use Apple services, such as the Apple Online Store or registering your product online, you create an Apple ID. You can use the same Apple ID for iTunes, the Mac App Store, iCloud, iMessage, FaceTime, Game Center, and more.
It is recommended to use only one Apple ID.
If you have registered your product or used any Apple services, you should follow this article to use an existing Apple ID with the iTunes Store or Mac App Store.
If you have not created an Apple ID yet, this article will assist you in doing so on your computer in iTunes or on an iOS device.
Creating an account on a computer
- Click iTunes Store (on the left side of the iTunes window), and pick your country by clicking the appropriate country flag located in the bottom-right corner of the main iTunes Store page.
- Navigate to the App Store by clicking on App Store from the top navigation bar.

- Important: Before proceeding to the next step, you must download and install a free application. To find a free application, navigate to the Top Charts column on the right side of the App Store window. Scroll down until you see the list of Free Apps. Select any application by clicking on it. Then, click Free App underneath the application icon.

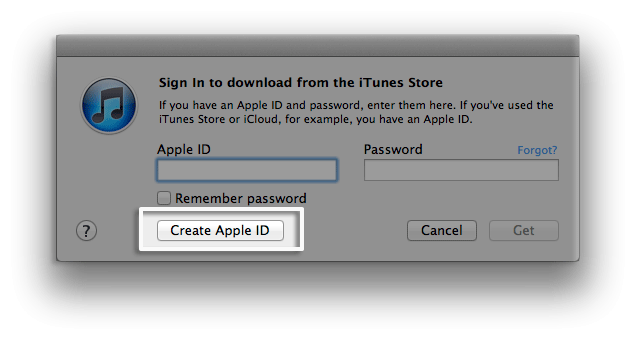
- In the pop-up window, click Create Apple ID.
- You are directed to the "Welcome to the iTunes Store" screen. Click Continue.

- You'll need to read and agree to the iTunes Store Terms & Conditions. Make sure you select the checkbox next to "I have read and agree to these terms and conditions."
- Click Continue.
- Enter your email address, create your password, continue to create and answer your security questions, and then enter your birthday.
- You can also enter an optional rescue email address. If you frequently change email addresses, this is recommended.
- Once you are satisfied with the information entered, click Continue.
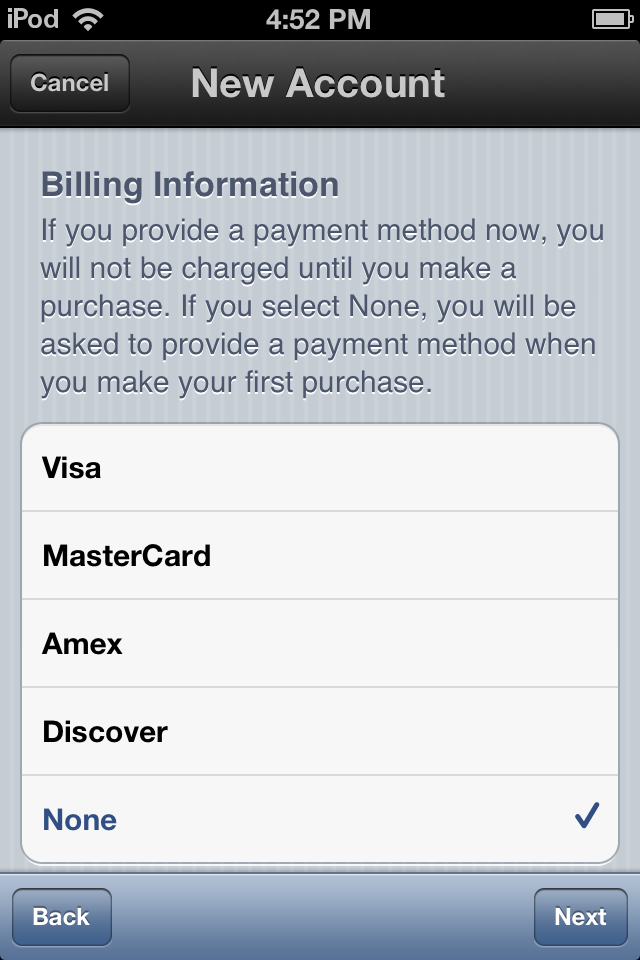
- Select None as the payment type.

- Continue to fill out the required name and address fields.
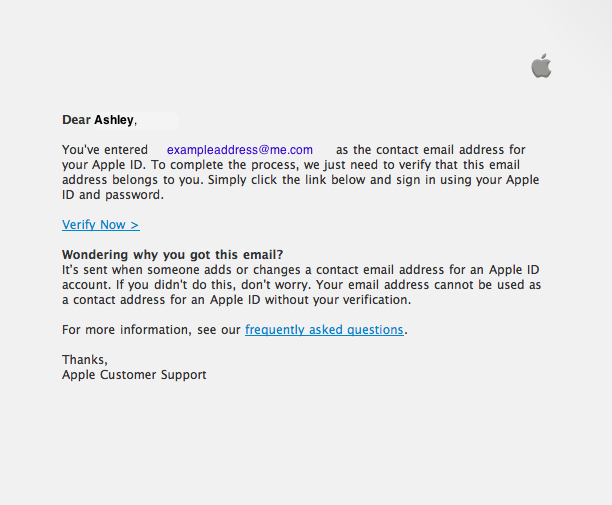
- You'll then see a "Verify your Account" screen. Click Done, and then check your email for a verification email from iTunes Store.
- Open the email, and click the link enclosed in the email to activate your account.
- Once you click on the link, the Apple ID website should ask you to sign in with your account name and password.
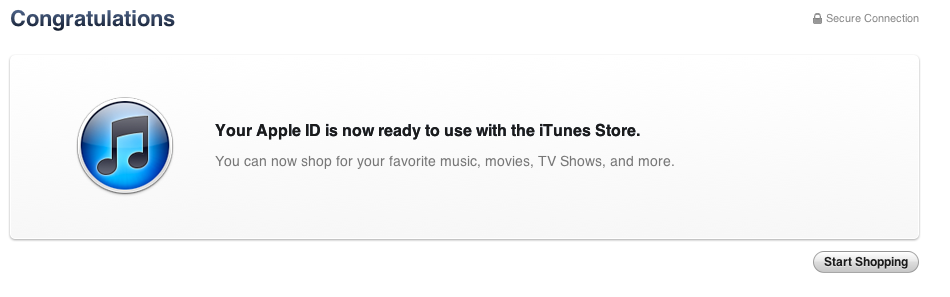
- After signing in, you should see that your email address is associated with your Apple ID. A button labeled "Return to the Store" should appear.
- Once you sign in, you'll then see the below "Congratulations" screen. Click Start Shopping to be taken to the App Store home page.
Creating an account on iPhone, iPad, and iPod touch
- Open the App Store on your device.
- Find a free application on the App Store.
- Important: Before proceeding to the next step, you must download and install the free application by tappingFree followed by tapping Install App.

- Tap Create New Apple ID.
- Choose your country, and then tap Done.

- You'll need to read and agree to the iTunes Store Terms & Conditions. Tap Agree located at the bottom of the page to continue.
- Enter your email address, security questions, birthday, and create your password.
- You also can enter an optional rescue email address. If you frequently change email addresses, it is recommended that you add a rescue email address. Learn more about the rescue email address.
- Once you are satisfied with the information entered, tap Next.
- Select None as your payment option.
- Continue to fill out the required email, address, and phone number fields. Tap Next.
- You'll then see a screen that says "Verify your Account." Tap Done, and check your email for a verification email from iTunes Store.
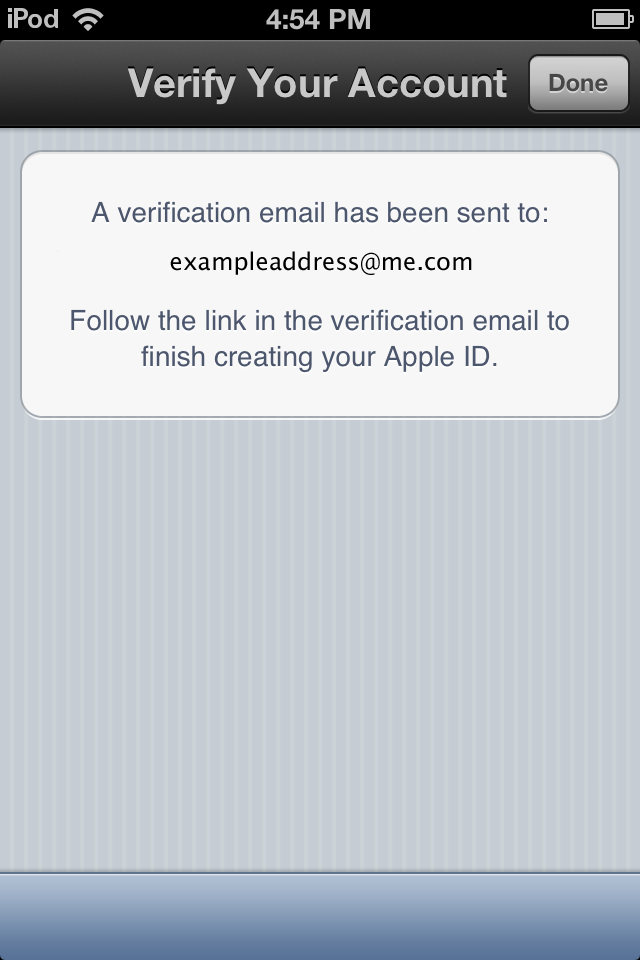
- Open the email, and click the link enclosed in the email to activate your account.
- Once you tap the link, the App Store should automatically open and prompt you to sign in with your account name and password.
- Tap Sign In, and you will see a thank you screen.
- You have set up your account successfully, and you can start enjoying iTunes, iBooks, and the App Store on your iPhone, iPad, and iPod touch.


Additional Information
For additional methods on creating an Apple ID for the iTunes Store, App Store, iBookstore, or Mac App Store, see this video tutorial.
Shop Amazon Home - Up to 40 Off Cooling Products
Post a Comment
Thanks for your Comment